Working and making updates on a live WordPress site can be dangerous. And it’s not a matter of whether or not you’re a skilled enough coder to do so.
There is any number of things that could go wrong when you issue a new update to a plugin or attempt to code in a new feature by hand. Anything you do that affects the code of a website presents an opportunity for something to go wrong on the frontend. And that’s not something your clients or their visitors will be too understanding of.
So, that’s why we use staging environments.
If you’re in the business of developing WordPress sites, then staging environments need to be part of your process. In the following article, I’ll cover the benefits of using staging environments, when you need to use them, and how you can easily get started with one inside and outside of WordPress.
If you’re in the business of developing WordPress sites, then staging environments need to be part of your process. In the following article, I’ll cover the benefits of using staging environments, when you need to use them, and how you can easily get started with one inside and outside of WordPress.
The Benefits of Using a Staging Environment for Your WordPress Site
A staging environment is typically hosted on a private subdomain of your WordPress site for the purposes of building and testing. You might want to use this as:
A blank canvas from which you build a new website or create new pages you plan to add to an existing website. This way, your clients, your managers, or anyone else who feels like weighing in before it’s appropriate to do so are prohibited from seeing your work until you’re ready to share.
A mirror image of a live website you want to test new WordPress, plugin, or theme updates on. Updates are first handled on the staging site. Upon confirming that no issues are present, you can move forward with them on the live site.
A mirror image of a live website you want to implement code or design updates to. This is especially helpful if you’re attempting to code a new feature on your own and are nervous about the repercussions of something breaking as a result.
A clone of a live website you’ll use to save time developing a similarly structured WordPress site from-scratch.
A platform to stage a website pre-launch in order to conduct QA and testing. Team members, clients, and other project stakeholders are then given a link to the frontend of the staged site for review.
A place to test new coding techniques. You can use a copy of a website that already exists or use a sample website to test out theories or to hone your implementation process before adding it to your workflow. You can also use this as a training platform for new developers on your team.
A place to build basic prototypes for the purposes of demonstrating a suggested design or feature to the client. This way, you don’t have to try to explain the idea you have for a landing page or a new checkout process or whatever it is you’ve thought of. Instead, you mock it up here and give them a way to experience it first-hand and avoid any potential miscommunications.
There are clear benefits to use staging environments for these purposes, too:
- Staging environments lend to safer coding practices, in general.
- They give you privacy to build and update websites without a bunch of prying eyes checking in on you.
- If something wonky gets introduced into the code, it won’t take down the live website or prevent complete access from the WordPress admin, which would reflect poorly on you as well as your client (if visitors were to notice).
- Staging sites save time you would otherwise spend repairing the white screen of death or troubleshooting other issues caused by cowboy coding on the live installation.
- They protect a live website’s search ranking as you prevent bots from encountering an error-ridden website, an offline website, or one that’s in transition and sending mixed signals.
At the end of the day, the staging site is meant to maintain the integrity of the live site displayed to visitors. The following section explains how to go about setting one up.
How to Set up a Staging Environment for Your WordPress Site
How you set up a staging environment depends on the purpose of it. If you intend on using it as a training or experimentation platform, you can do with it what you want. However, if you intend on using it for any other purpose (e.g. implementing WordPress updates, revising designs and code, adding new pages), then what sits in staging needs to be identical to the website.
This means having the same:
- Hosting
- WordPress version
- PHP version
- Theme version
- Plugin versions
- And any other configurations that are essential to how the site works on the live server
The rest is yours to do with as you like.
To set up a mirror image of your WordPress site in the staging environment, you can use one of three means: the manual method, work with your managed WordPress host, or use a WordPress plugin.
Option A: The Manual Method
As Rachel McCollin explained in How to Easily Set up a Staging Site for WordPress on Cheap Shared Hosting, the manual method is simple enough:
- Save a backup of your WordPress site.
- Create a subfolder on your WordPress site.
- Install a fresh copy of WordPress on it.
- Copy files from your current site into this new WordPress installation.
- Copy your database from the current site over to this new installation.
- Create a subdomain from your control panel where this staging site will sit.
Be sure to read Rachel’s post for further instructions and screenshots on how to use the manual method and SFTP to set up a staging environment.
Option B: Set It Up with Managed WordPress Hosting
While the manual method has you working within the control panel and SFTP to set up a staging environment, there is another option outside of WordPress that will do the same thing. However, this one requires much less work on your part.
If your website has a managed WordPress hosting plan with one of these providers, you’re in luck:
- Flywheel
- Kinsta
- Pagely
- SiteGround
- WPEngine
Most managed WordPress hosting plans with the providers above come with one-click staging or pre-made staging areas. All you need to do is log into your hosting account, and instantly create a password-protected staging site on your server.
Your WordPress host will also be able to save backups of your staging site, so you won’t have to worry about losing progress or “breaking” the test site without a quick way to reset it.
Pushing updates from a staging site to the live server is just as easy with this option. Just one click and your staging environment will go live
Option C: Use a WordPress Plugin
For those of you who would like an option in between these two–one that requires less work on the server and doesn’t require the cost of managed WordPress hosting–use a WordPress plugin.
I’m going to recommend two options here and, really, the difference boils down to your comfort with setting up WordPress Multisite.
Without Multisite: All-in-One WP Migration Plugin

All-in-One WP Migration is a plugin with multiple uses. It works as a backup plugin, a migration plugin, and yes, even as a staging plugin. But let’s focus on how to use this for staging.
- Install and activate the plugin on your WordPress site. Go to the All-in-One WP Migration menu on the sidebar and click on “Export”.
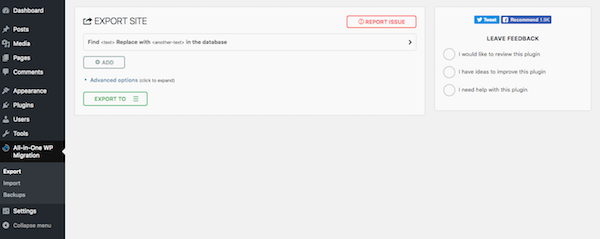
- Click on the “Add” button. In the Find and Replace boxes, enter the name of the live site as the “Find” and the name of the staging subdomain as the “Replace”. (This assumes you already created a subdomain for staging from your control panel.)
- Then, select Export to File. Click on the box to save it to your computer.
- Next, log into the WordPress installation for your staging environment (the one on the subdomain you created). Install the same migration plugin.
- This time, click on Import.
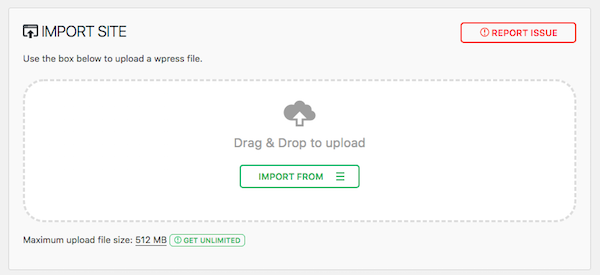
Upload the file you just saved to your machine. When you see this warning, click “Proceed”.
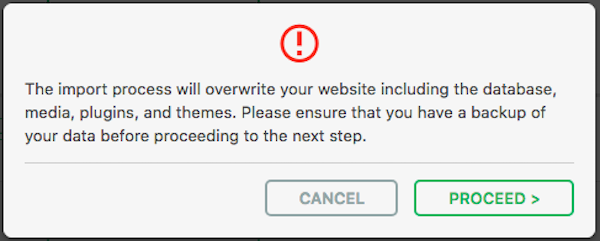
And that’s it. You now have a mirror image of your live website sitting on your staging subdomain.
To push your staging environment and any changes made there live, you simply have to reverse the process.
With Multisite: Cloner Plugin
There’s also the option to set up your subdomain on a Multisite network.
One of the nicest perks of creating a staging environment this way is that you get to keep your live WordPress site and its private and non-indexable staging subdomain within one WordPress installation. So, you don’t have to move back and forth between your control panel and various WordPress instances to manage both.
As for using this method, the process looks a little something like this:
- Activate Multisite (if it isn’t already).
- Back up your Multisite with Snapshot.
- Add a new site to the Multisite network for your staging subdomain.
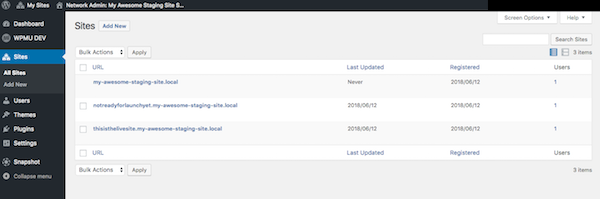
Under the subdomain’s Info tab, uncheck “Public” and save your changes. You’re only going to want your admins to be able to see the site.
- Install Cloner on your Multisite network.
- Go to the Plugins menu and click on Settings for Cloner.
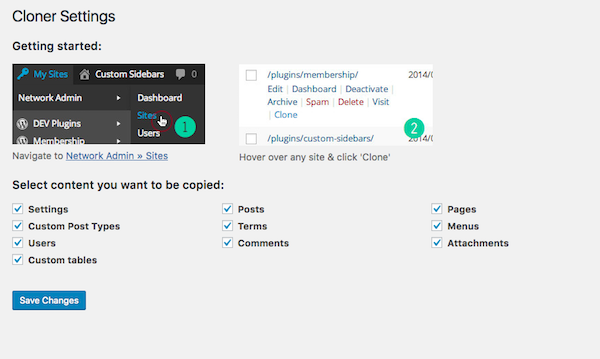
From here, you can decide which parts of your Multisite subdomains are cloned. Save your changes.
- In the top admin bar, hover over My Sites > Network Admin and select “Sites”.
Find the live website you want to copy, hover over it, and click “Clone”.
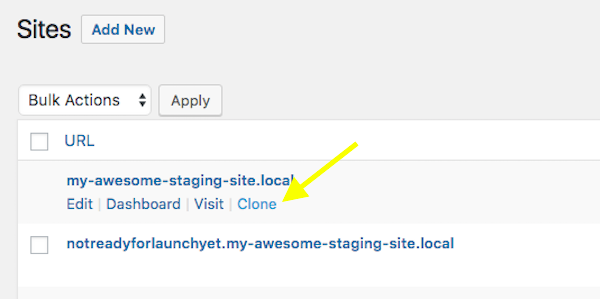
- If you have already set up the subdomain for the staging environment, choose “Replace existing Site” and find the name of it in the search bar.
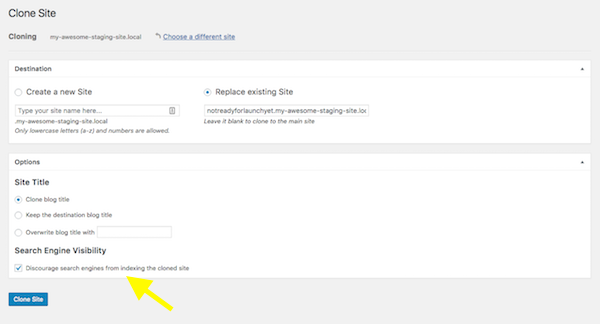
Otherwise, just create a new site on the network.
Don’t forget to check “Discourage search engines from indexing the cloned site”. Then, click “Clone Site”.
Go ahead and bypass the warning message if you’re sure you want to replace the subdomain with the live site’s content. Then, you should be ready to get to work on your staging environment. All settings, files, and database will mirror what exists on the live site.
To move the staging environment to the live server, you’ll simply need to reverse the process. There will be no need to create new sites or subdomains. Simply clone the subdomain to the live site once you have client approval on everything or you’ve verified that updates are good to go.
Wrapping Up
Think about all the time you’re going to save by using staging environments in your WordPress development workflow going forward. Whether it’s to prevent receiving unwarranted feedback from clients, to keep your site safe when issuing updates, or to code new features in a separate environment, staging environments preserve the integrity of your live WordPress site until you’re 100% sure those updates can be reflected on the frontend.
Oh, and if you do start using staging environments in WordPress, don’t forget to install these tools to streamline your workflow even further.
Over to you: If you’re already using staging environments in your workflow, which of the methods above do you use? Has this article made you decide to use a different one?
@premium.wpmudev.org