
This tutorial will show you how to set up a WordPress password protect page, along with methods to protect your entire WordPress site using plugin.
How to Password Protect a Post, Page, and WooCommerce Products
If you want to password protect a single post, page, or WooCommerce product, WordPress actually includes a built-in feature to help you set this up via its Visibility setting.
To password-protect a single WordPress page with WordPress’s default editor, follow these steps:
Log in to WordPress as an administrator.
From the dashboard, head to Pages » All Pages.
Click Edit on the page content you want to hide.
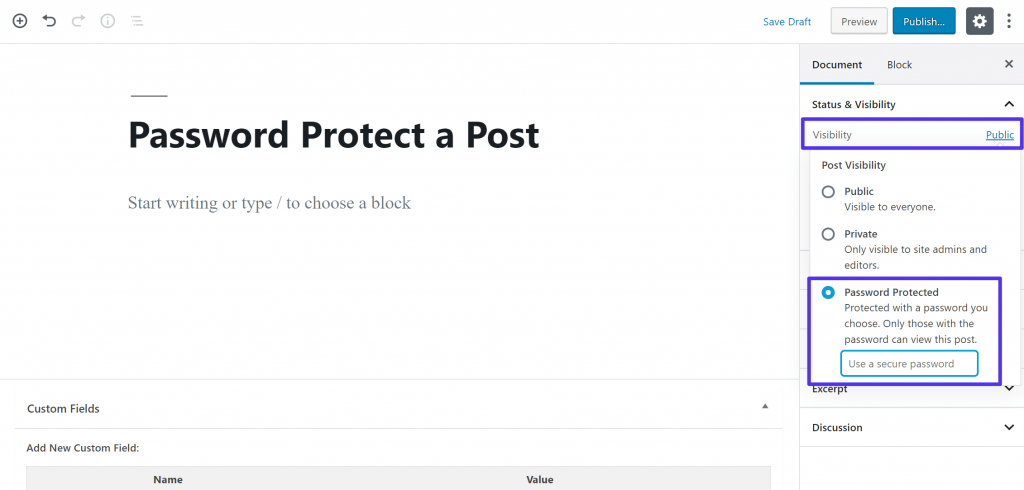
In the top left corner, under the Status and Visibility settings click the Public link.
From there, select the Password Protected option to protect your page and enter a password.
Then click Publish or Update.
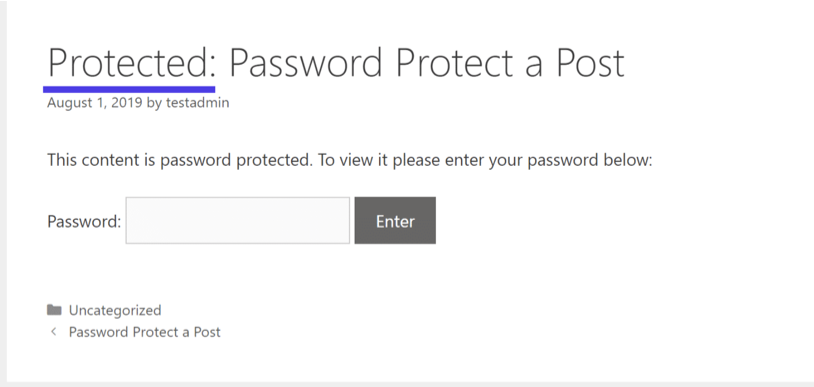
Once you publish or update the piece of content, visitors will be prompted to enter the password before they can view the post. Additionally, WordPress will prepend “Protected” before the title of the post.
There is a tip that I like using this method is that you can actually let people unlock multiple posts by entering the password one time. To set this up, all you need to do is reuse the same password across multiple posts.
Once a visitor enters the password one time, it will automatically unlock all the pieces of content that use that same password. If another piece of content uses a different password, though, then visitors will still need to enter that unique password.
How to Password Protect an Entire WordPress Site?
To lock down an entire WordPress site, you’ll need to install a WordPress password protect page plugin.
We recommend the free Password Protected plugin from Ben Huson, which is highly-rated and available at WordPress.org.
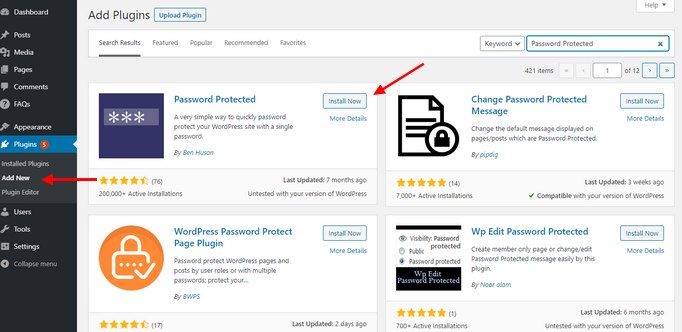
The first step is to install the plugin. Login to your WordPress admin dashboard and go to Plugins >> Add New. Search for Password Protected plugin. Click Install and then Activate.
Once you’ve installed the plugin, you have to configure it to work with your website.

Check the Password Protected Status box to enable password protection and enter your desired password in the New Password box.
Another nice thing about the plugin is that it also gives you the option to whitelist certain types of users/requests, as well as IP addresses. You can configure these if desired:
Once you’re done, hit the Save button to save the changes.
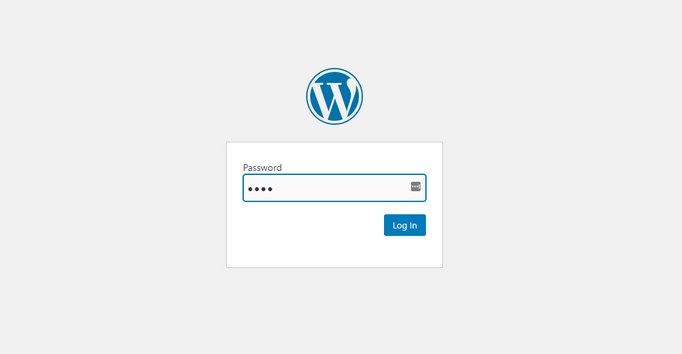
Once you activate it, anyone who tries to visit your site will need to enter a password in a stripped-down version of the WordPress login page:
Note: Password Protected plugin uses Cookies to lock websites behind a password. If the plugin doesn’t work on your website, make an exception for it on your caching plugin. Or contact your web hosting provider if they have a built-in caching system on their servers.
Wrapping Up
I showed you 2 ways to Password Protect Your Entire WordPress Site or Single Page. You should use the method that’s appropriate for your website depending on the goals you want to achieve. Either way, it doesn’t take much work to set it up.
Be sure to explore our blog for more tips and guides like this.