This is a step-by-step guide to using SUCURI Security plugin to protect and speed up a WordPress site.
What is SUCURI Security Plugin
Two most important metrics for any site is Performance & Security.
However, one of the quickest and cost-effective ways to supercharge your WordPress site and add protection is by using cloud-based security provider (CBSP) such as SUCURI.
Wondering, what is SUCURI?
SUCURI is all-in-one security & CDN (content delivery network) platform for WordPress, Joomla, Drupal, Magento, phpBB, etc.
In this guide, we will explain how WordPress security plugin works – from installation and features, to what you can expect from this free monitoring and security plugin.
Installation and Activation Sucuri
The WordPress security plugin is free to all WordPress users. It is a security suite meant to complement your existing security posture, offering its users a set of security features for their website:
- Security Activity Auditing
- File Integrity Monitoring
- Remote Malware Scanning
- Blacklist Monitoring
- Effective Security Hardening
- Post-Hack Security Actions
- Security Notification
- Website Firewall (premium)
For full-spectrum malware and DDoS protection, we recommend installing a website firewall. A complete security plan should also include backups, server-side detection, and emergency response.
1.1. Install the Sucuri security plugin
The Sucuri Scanner is in the official WordPress.org plugin repository. It can be installed and activated by a WordPress user with administrative privileges. Keep in mind that you will require WordPress version 3.6 and up.
To install the Sucuri security plugin:
- From the WordPress Dashboard go to the repository Plugins > Add New on the left side of the dashboard.
- Type Sucuri in the repository search query box.
- At the upper side of all available plugins you will see the Sucuri logo and the title Sucuri Security – Auditing, Malware Scanner and Security Hardening
- Click Install.
- Click Activate. This will take you to the installed plugins page.
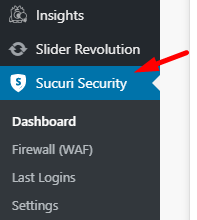
Once completed, you can access all features by clicking on the Sucuri Plugin option on the right-side menu of your WordPress dashboard.
1.2. Generate API
Activating the API allows your WordPress account to connect to Sucuri server. If an attacker somehow compromises your site and removes the plugin’s audit logs from your server, they can be recovered from Sucuri server for investigation.
To generate the API key for the Sucuri plugin:
- Log into your WordPress website as an administrator and open the Sucuri plugin.
- Click Generate API Key to the upper right side of your screen.
- Check the Terms of Service and Privacy Policy boxes once you have read them.
- Click Submit. An email confirmation will be sent to the primary email address with confirmation.

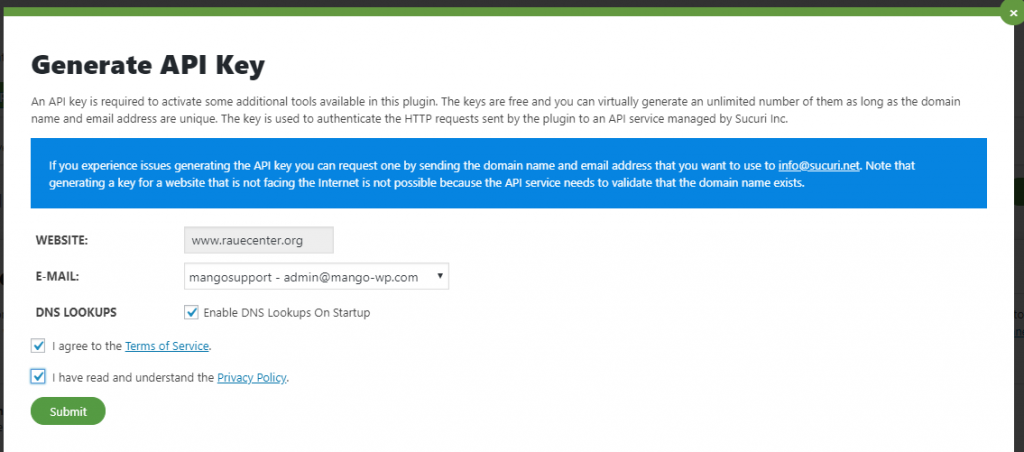
Once the API key is generated, the plugin will communicate with a remote API service that will act as a safe data storage for the audit logs generated when the website triggers certain events that the plugin monitors. If the website is hacked, the attacker will not have access to these logs. Now you can investigate any modifications (for malware infection) and/or how the malicious person gained access to the website.
1.3. WordPress Hardening
Now, go to the Sucuri settings page. This is where you can configure the entire plugin settings.Click the Apply Hardening button to any of the security options described below.
Click the Apply Hardening button to any of the security options described below.
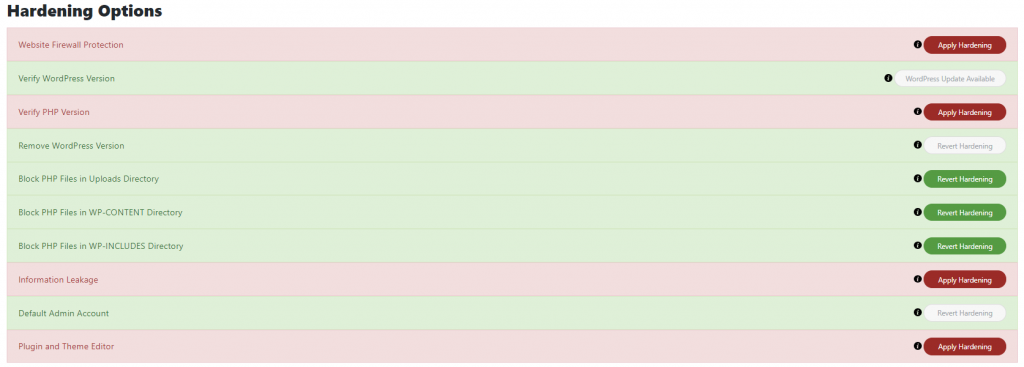
Hardening options:
- Website Firewall Protection — If you are a Sucuri customer, you can link to your firewall account to view statistics in WordPress.
- Verify WordPress Version — Checks when your website, or any of its components are not up to date, this section will warn you with a prompt to the newest version.
- Verify PHP version — Checks whether your server is running the latest version of PHP.
- Remove WordPress Version — Allows you to remove the version of your CMS from being publicly displayed.
- Block PHP Files in Upload Directory — Disables the execution of PHP files inside your uploads directory. This can break certain plugins so test beforehand.
- Block PHP Files in WP-CONTENT Directory — Places a .htaccess file inside the wp-content to prevent external access.
- Block PHP Files in WP-INCLUDES Directory — The same as above but for wp-includes.
- Information Leakage — Checks for the presence of a readme.html file on your site, which contains your WordPress version and deletes it.
- Default Admin Account — Checks for the admin user. This used to be standard in former times and is a favorite target for hackers.
- Plugin & Theme Editor — Disables the plugin and theme editor to prevent access to sensitive files by other users (and possible hackers who have broken into your site).
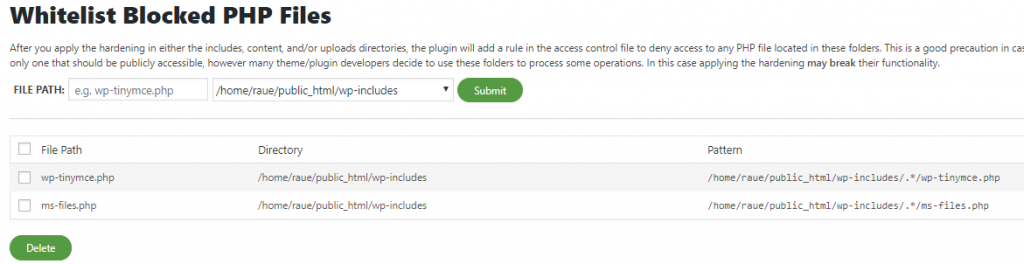
Whitelisting Files
Hardening requires testing. There’s not one set of rules that will work for every site. If you find that certain plugins or themes are not working correctly after applying the hardening to wp-includes, wp-content, and/or wp-content/uploads, you can whitelist files to fix it.
1.4. Email Alerts
Go to the alerts tab. This is where you can configure the notification settings.
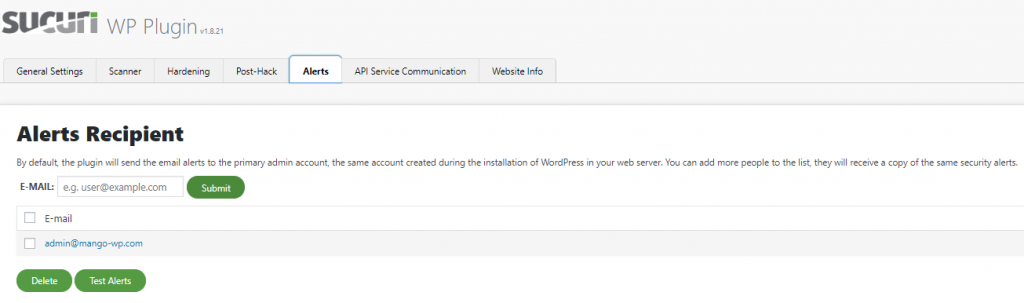
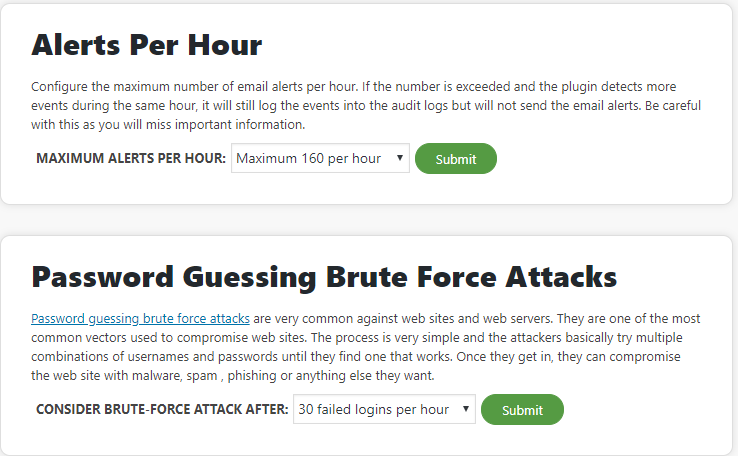
You will be able to add extra email addresses as the notification email. Set the maximum notifications an hour and brute force prevention.
Security Alerts – Here you can select from the list provided which events will trigger a security alert.
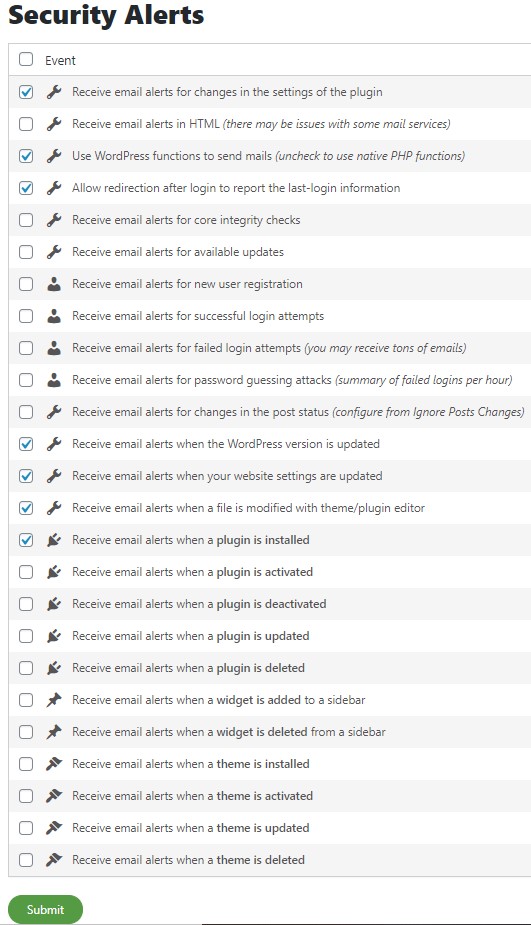
Click Submit to save any settings.
Thank you for your watching. If you need further help with the plugin, please submit a ticket in the Mango Support