
Do you want to prevent your page from refreshing when a visitor submits a form? By default, the entire page reloads upon clicking on the form submit button. And that is when the data entered in the form is transferred and stored in the server.
In this article we’ll show you how to enable Ajax submission on your WordPress forms and prevent the page from reloading.
Why Enable Ajax Form Submission in WordPress
Ajax form submission is especially helpful if you want to embed a form in a modal popup. Without AJAX form submission enabled, the entire page would need to refresh, leading to the closing of the popup window. That way users could miss the important confirmation message that keeps them engaged.
With AJAX form submission enabled, your users could see the confirmation message upon form submission on the same page without a reload.
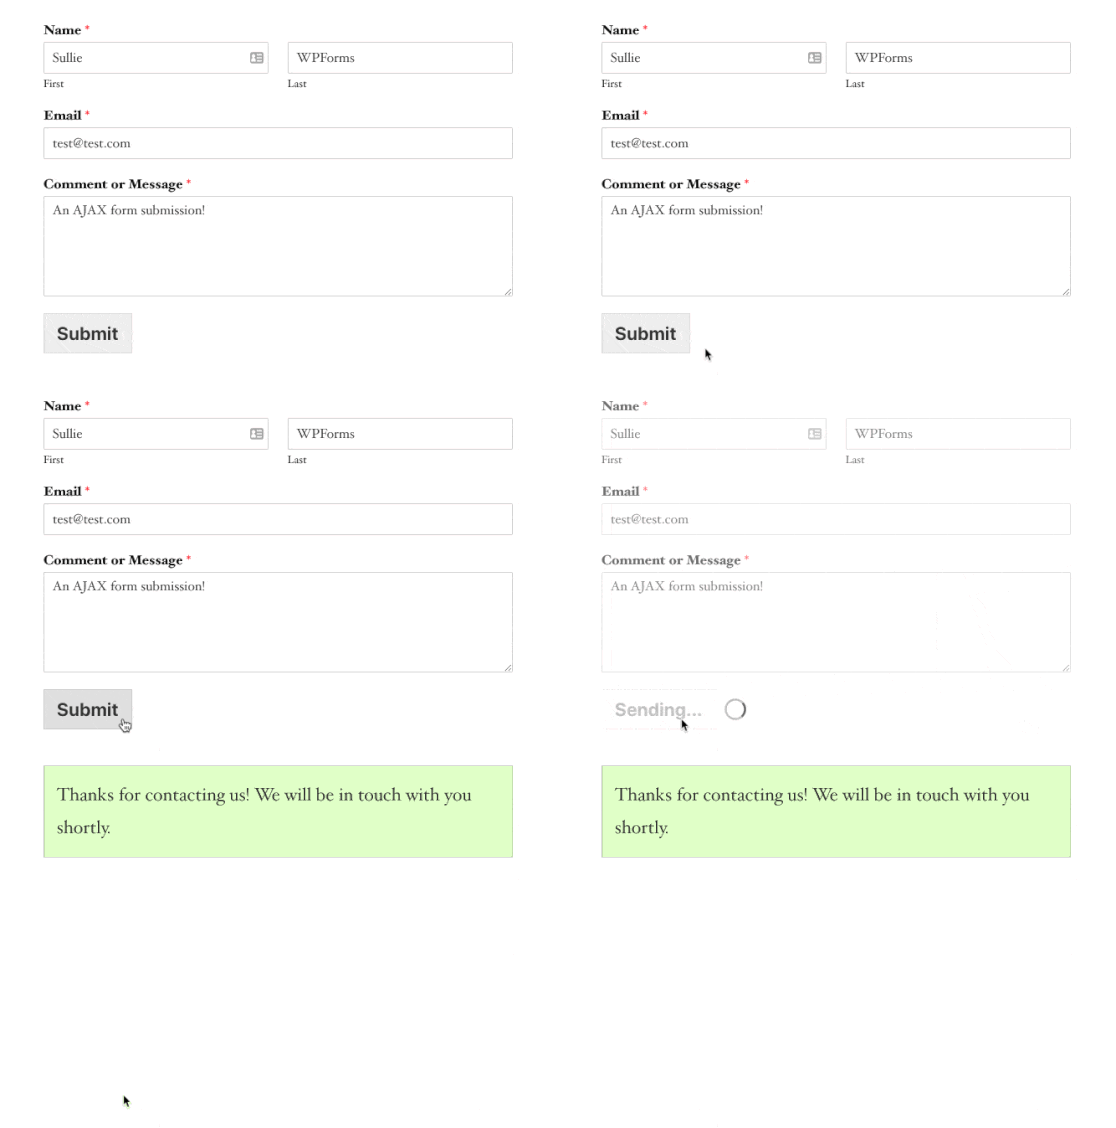
To enable ajax form submission on your WordPress site, we recommend WPForms, the best form plugin for WordPress.
Step 1: Creating a New Form
To start creating your form, you’ll first have to install the WPForms plugin on your WordPress website.
Not sure how? No problem. You can hop over to our guide on how to install a WordPress plugin to get that all sorted out.
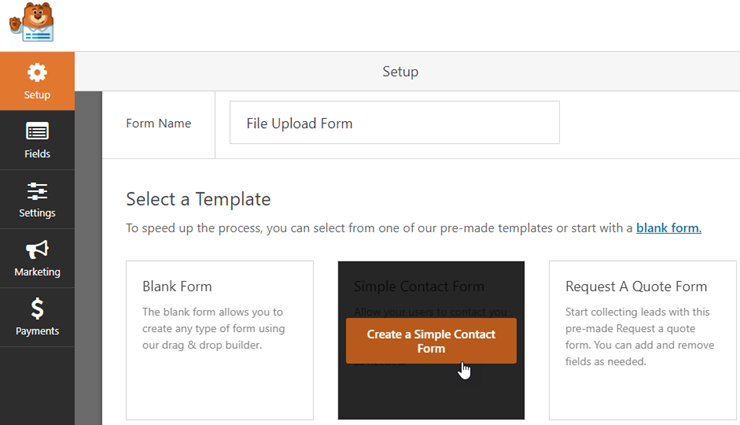
Once the plugin is installed and activated, go to your WordPress dashboard and navigate to WPForms » Add New. You will now be redirected to a page where you can select a template for your form.
WPForms offers 7 different form templates to choose from. Let’s select the Simple Contact Form option for this tutorial and then add a file upload field to the form.
You will now see the form builder on your screen. On the left side of your screen, you have the Add Fields and the Field Options tab. You can use these tabs to configure your contact form.
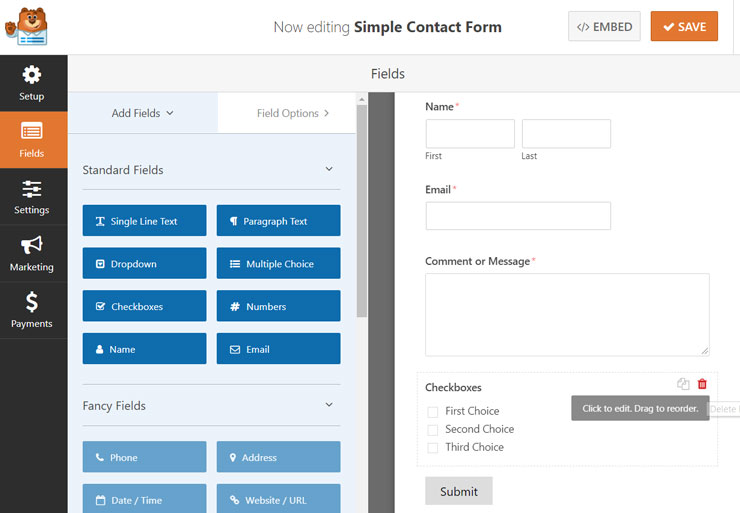
WPForms makes it easy for you to add fields to your form with drag and drop. You can also change the position of the fields by dragging and dropping. If you want to remove a field, that is easy too. Just hover your cursor over the unwanted field, and click on the delete icon that will appear at the top right corner of the field.
Under the Field Options tab, you can change the field’s label, change the format of the name field, alter the font size and enable or disable labels and sub-labels. You also have an option to enable the conditional logic option.
Once you are done creating your form with the form builder, click on the save button, so your changes remain intact.
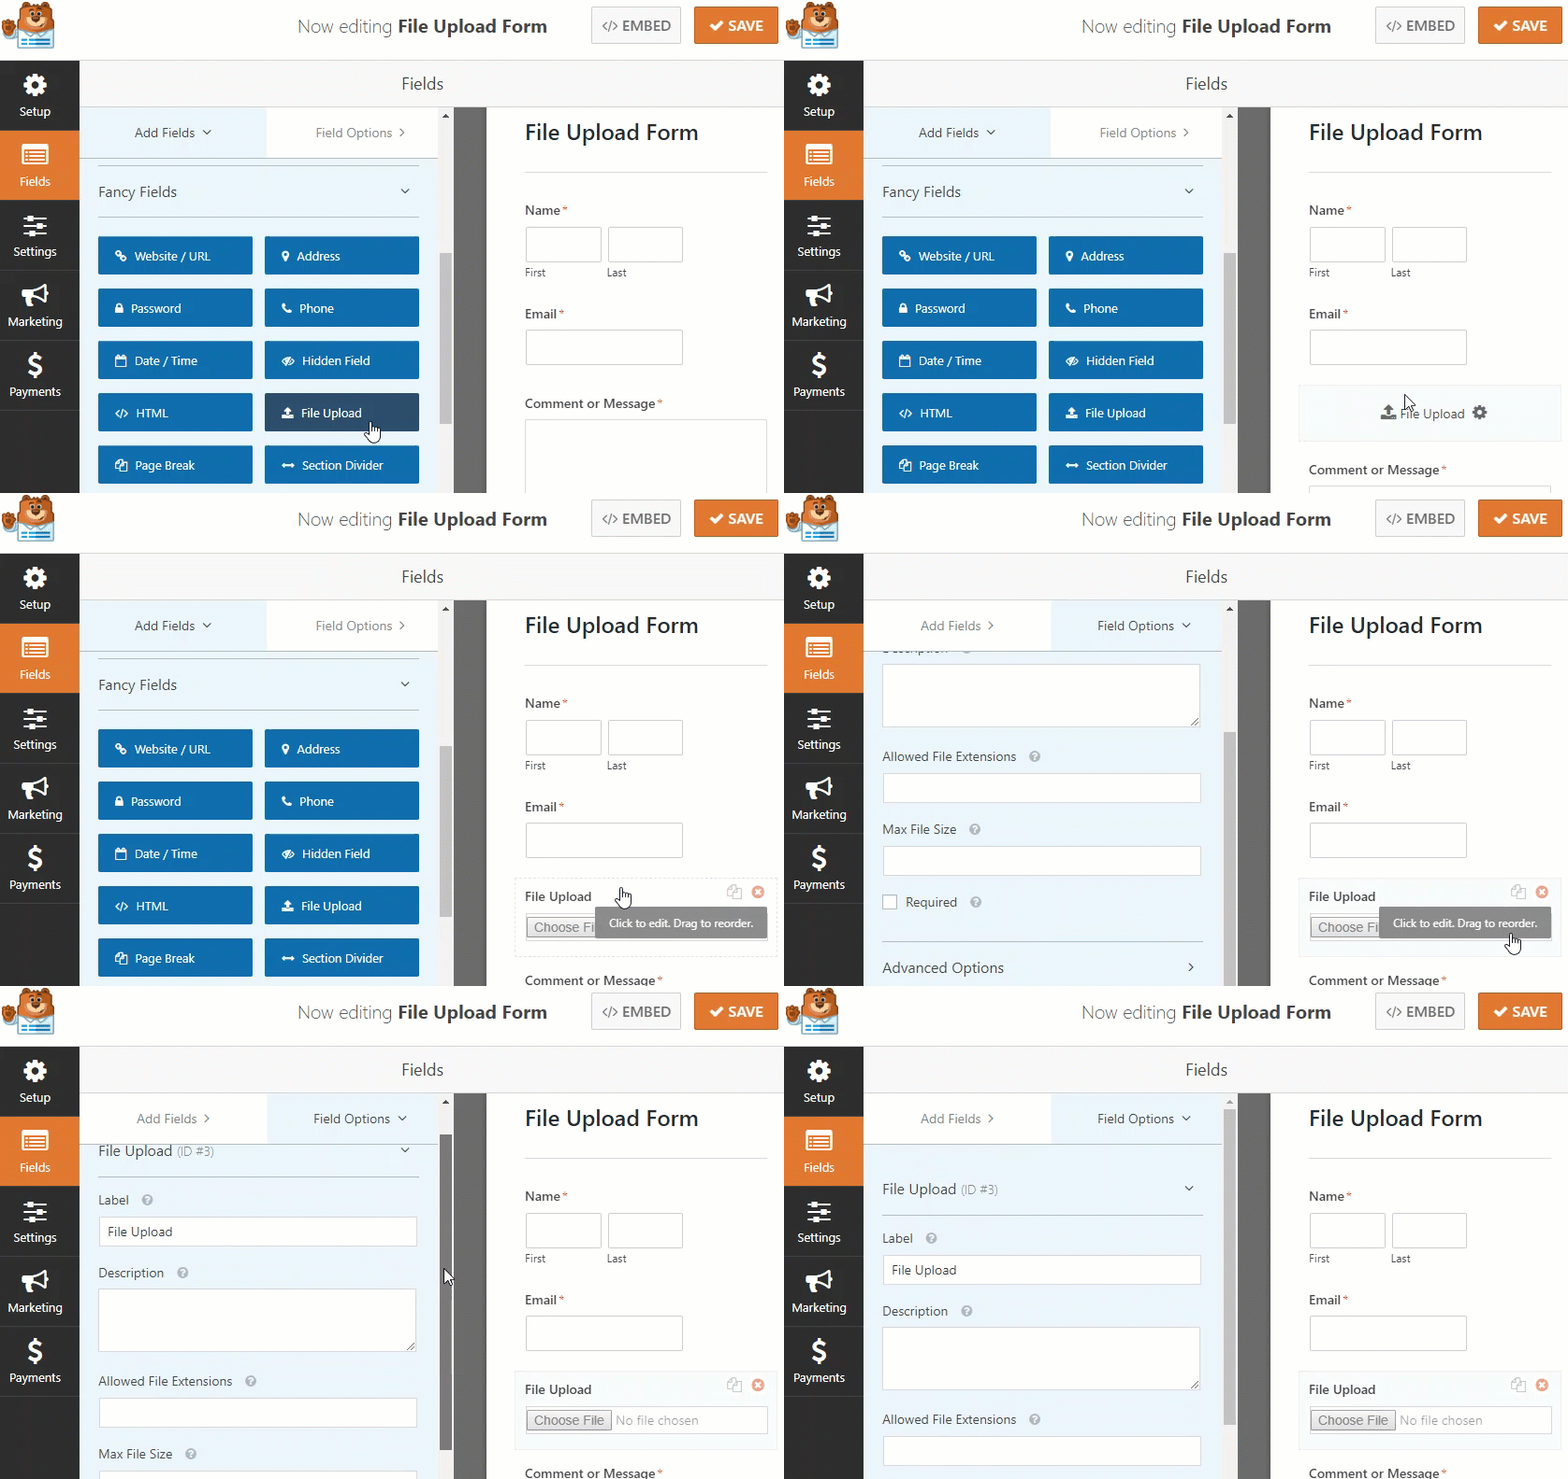
Now that we’ve created a simple contact form, let’s add the file upload feature to it.
To add a file upload feature, all you have to do is click on the File Upload field in the left-hand panel. Alternatively, you can drag the File Upload form field and drop it to your preferred position in the form builder.
Step 3: Enabling Ajax Form Submission
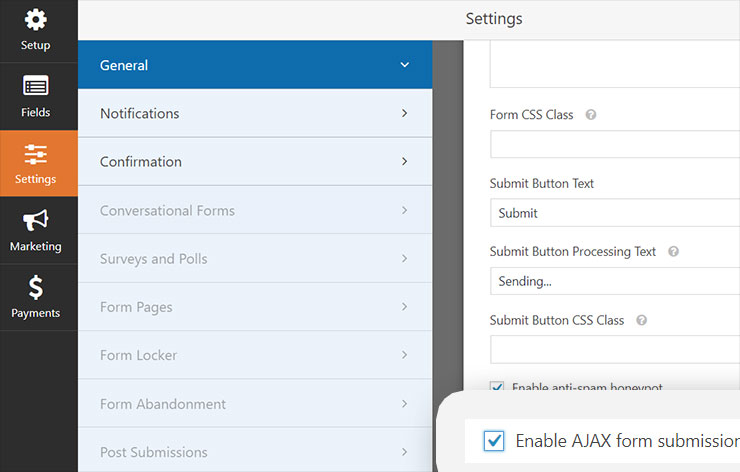
Once your changes are saved, click on the Settings tab on the left side of your page builder. You will see several options here. Go to the General option. Under this, you will see a number of fields. Here you can change the name of your form, add a form description, change the button text, etc.
If you scroll further down the screen, you will see a few checkboxes. You can select the checkbox that says Enable Ajax Form submission. Complete the process by clicking on the Save button on the top right corner of your screen.
Now go to the Notification tab below the General tab. This option will notify you every time someone submits your form. So in the 1st field enter the email address of the admin or whoever is in charge of receiving the emails. You can also enter the Email subject, name of the sender, address of the recipient and a message of your own.
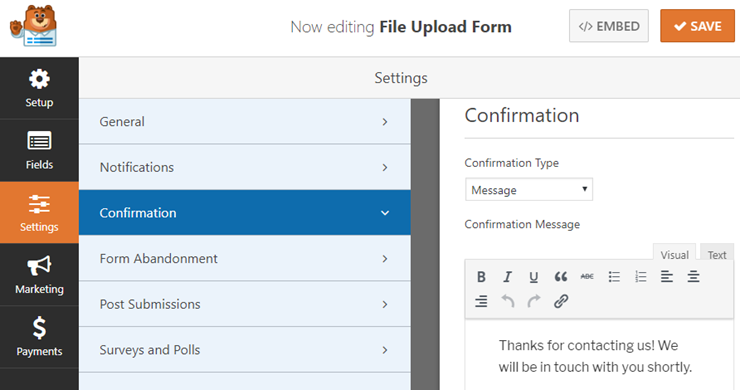
Once done, make sure you save the changes. You can also set a confirmation message that the visitors will receive after they hit the submit button.
Step 4: Publishing Your Form with Ajax Submission
The final step is to publish your Ajax submission enabled form on your website. For that, go to the page where you want the form to appear.
You can start by going to Pages » Add New on your WordPress dashboard. Now add a title to your Page. On the text editor of your page, click on the Add Form option. A new window will pop up on your screen.
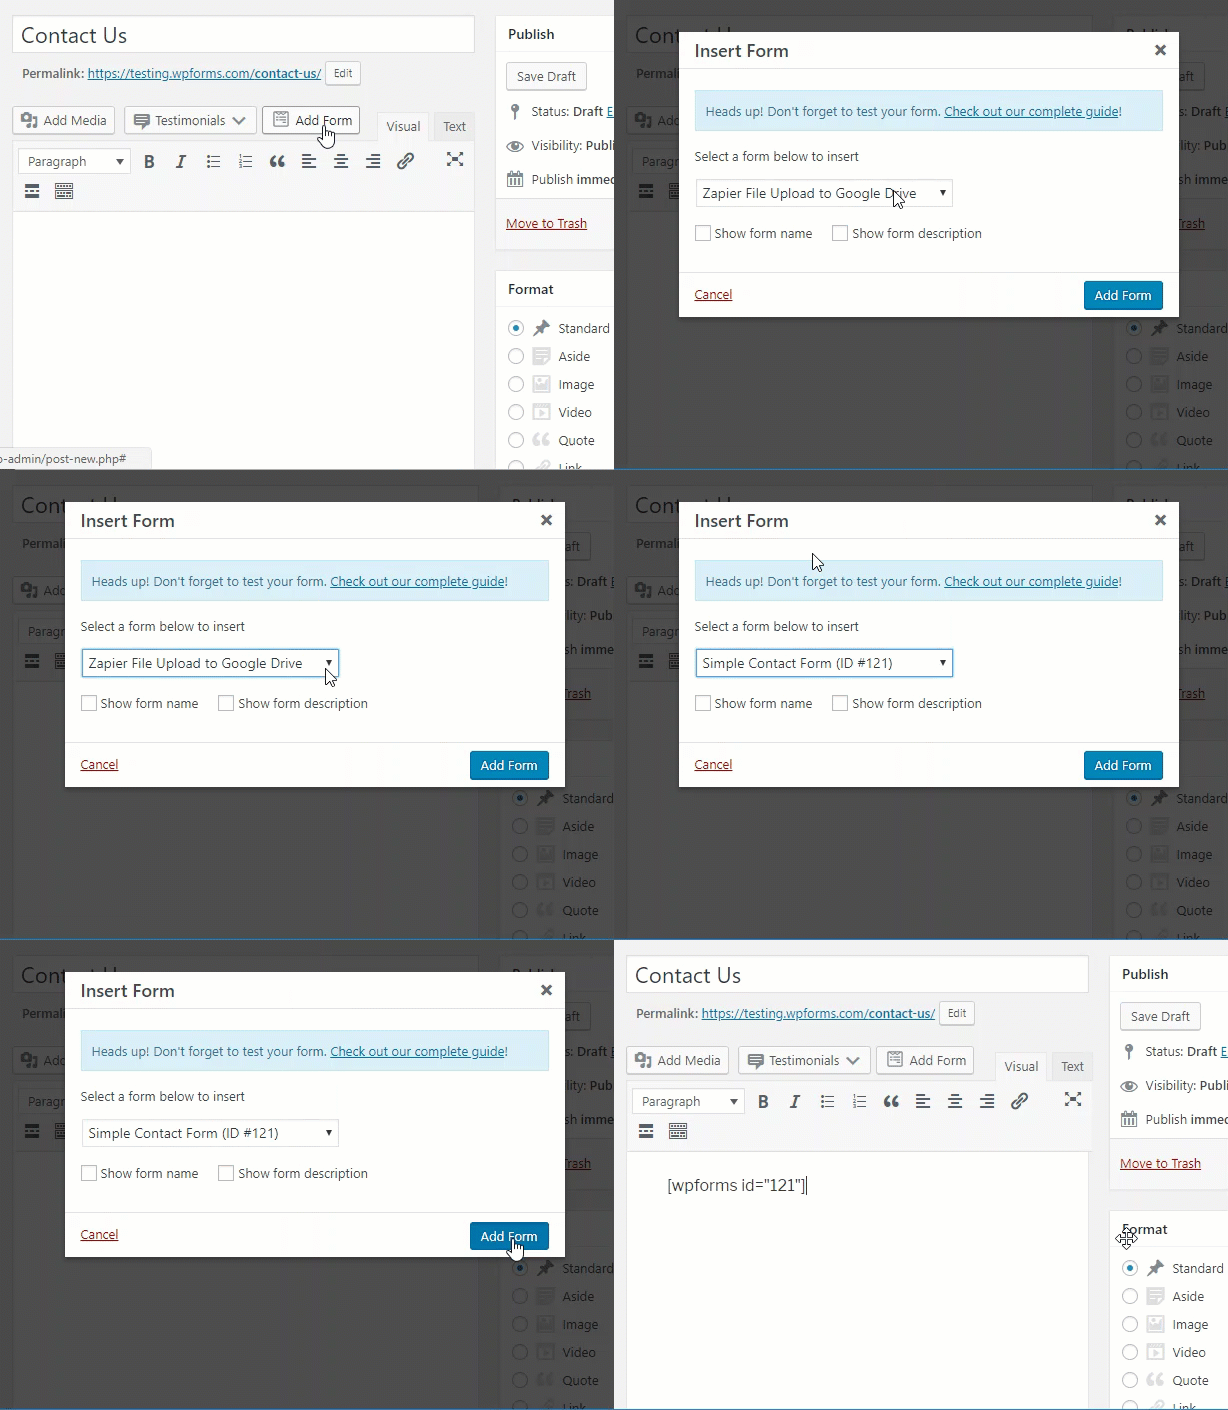
Click on the dropdown arrow and select the form that was just created. Now click on the Add Form button. You will see the embed code being reflected on the text editor of your page. You can check how the form looks like by clicking on the Preview button on the right-hand side of your screen.
You can then click on the Publish button to finally let the form go live.
That was easy, wasn’t it?
@isitwp.com
bet 168
Wonderful post! Please when I will see a follow up!