WordPress is the most popular and versatile CMS out there and there’s no denying the fact that WordPress.com is an ideal blogging platform for webmasters who want to create a free blog in minutes.
WordPress.com, although free, comes with an array of limitations that permit users from leveraging the CMS to its full potential and, for this reason, some WordPress.com users want to take their site to the next level and delve into its self-hosted version, WordPress.org.
Making the switch from WordPress.com to WordPress.org may be intimidating – especially for users who aren’t as technically inclined as others. Keeping this in mind, we’ve put together a comprehensive guide to help webmasters move their blogs from WordPress.com to WordPress.org without running into any dead ends or risking losing their content.
Before we get started, let’s put this all into context.
WordPress.com vs. WordPress.org
If you’re a WordPress newbie, you’ve probably heard about both WordPress.com and WordPress.org (maybe even used them interchangeably). One thing is for sure – mixing them up from time to time is common in the WordPress community. Let’s get some things straight before we move any further.
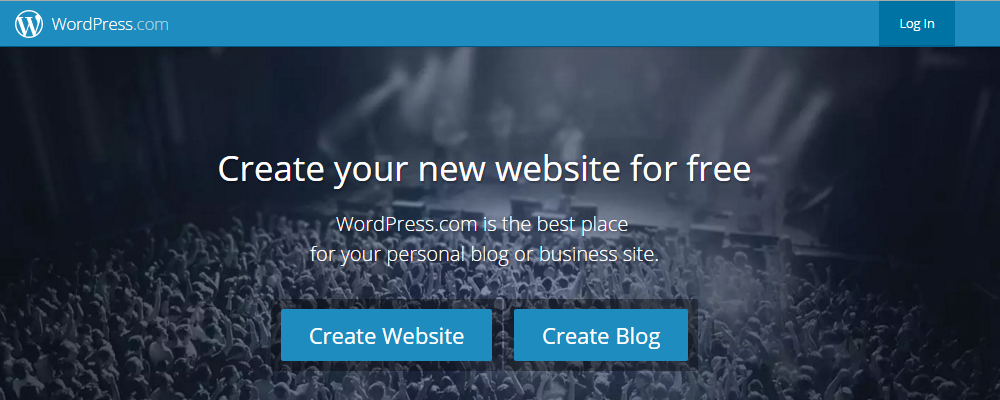
What is WordPress.com
WordPress.com falls under the category of a commercial site that enables users to host their sites without charge. The underlying, open-source platform is the brainchild of Matt Mullenweg and his company, Automattic. With WordPress.com, users are exempted from paying hosting charges. They can, however, purchase premium themes to add visual appeal to their site.
What is WordPress.org
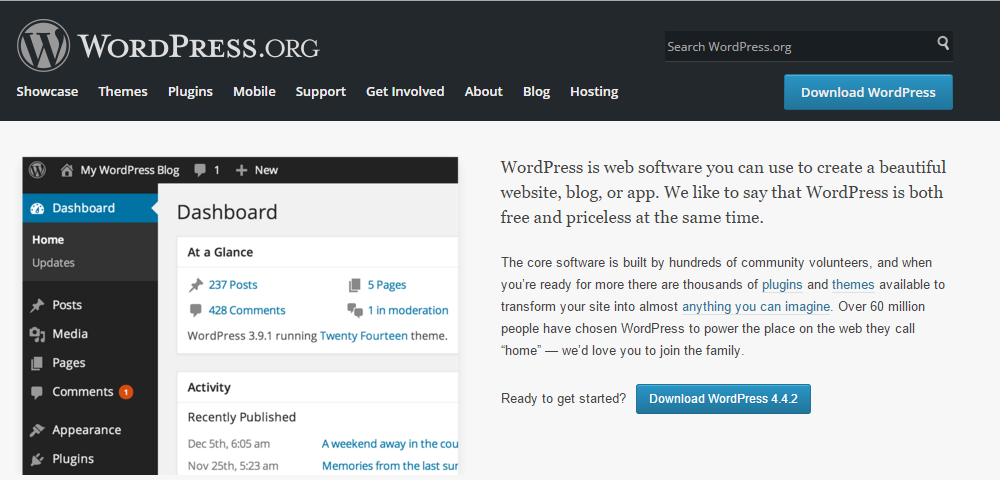
WordPress.org is the place you go to get the WordPress CMS software from. Once you get the free software, you’re left to find an appropriate hosting provider and domain name on your own. WordPress.org comes with comprehensive documentation on just about everything you could ever want to know about the platform and its usage.
Limitations of WordPress.com
In a nutshell: With WordPress.org, you get full control whereas with WordPress.com you get limited control over your WordPress site.
WordPress.com restricts users from many of the features which are available in WordPress.org. For instance,
- Site’s URL will be long and unappealing.
- Users can’t upload plugins.
- Limited storage space allotted.
- Restrained control over your site.
- Users can’t access FTP client.
- Users can’t monetize their site.
- Users don’t own the site since they don’t pay for hosting.
With limitations like these, it’s difficult to make it big in the world of blogging or take your online business up a notch. Now that you’ve really taken to stardom, it’s time to move on to bigger things – starting with moving your WordPress.com blog to a self-hosted WordPress.org platform.
Before You Get Started
By now you’re probably convinced that WordPress.org is much, much more flexible and feature-rich than its free counterpart. However, before you can move on to the tutorial, there are a few things you’ll need to have in place.
WordPress.org is a self-hosted platform which means that the first thing you’ll need is to have a domain name and sign up for a reputable web hosting service that acknowledges WordPress. The hosting company you ultimately decide to go with will affect your site in the long run.
I wholeheartedly advocate Bluehost hosting service for WordPress sites. The Shared Hosting plan is a great way to start out with WordPress.org without breaking the bank. In addition to the low-costs, you’ll also get the following benefits:
- A free domain.
- 1-click, hassle-free WordPress install.
- 24/7 premium support from Bluehost’s customer service representatives.
- 30-day money back guarantee.
Signing up for Bluehost is a no-brainer; it’s a reliable, cost-effective hosting provider that has all the features you’ll need to start out with a self-hosted platform in place along with a dedicated support staff to help you out in case you run into any difficulties.
The other really important thing you’ll need is to access your WordPress.com account in order to transfer your blog’s content (images, posts, pages, and other such data) to your brand new self-hosted site. Make sure you have your WordPress.com account’s login credentials handy.
Now that we’ve gotten the preliminary steps out of the way, let’s move on to the tutorial.
How to Move Your Blog from WordPress.com to WordPress.org
Moving your free WordPress.com blog site to self-hosted WordPress.org might not be a cakewalk but it isn’t all that complicated either. In this section, we’ll walk you through five simple steps to make the transition.
Step 1: Export Data from WordPress.com
Transferring data from your WordPress.com site to your new WordPress.org site is a nearly painless process thanks to the utterly useful Export tool that.
- Login to your WordPress.com site’s account.
- Navigate to Tools > Export from the WordPress Dashboard.
- You will be re-directed to the Export You will be prompted to choose between the free Export option and the Guided Transfer.
- Click on the free Export
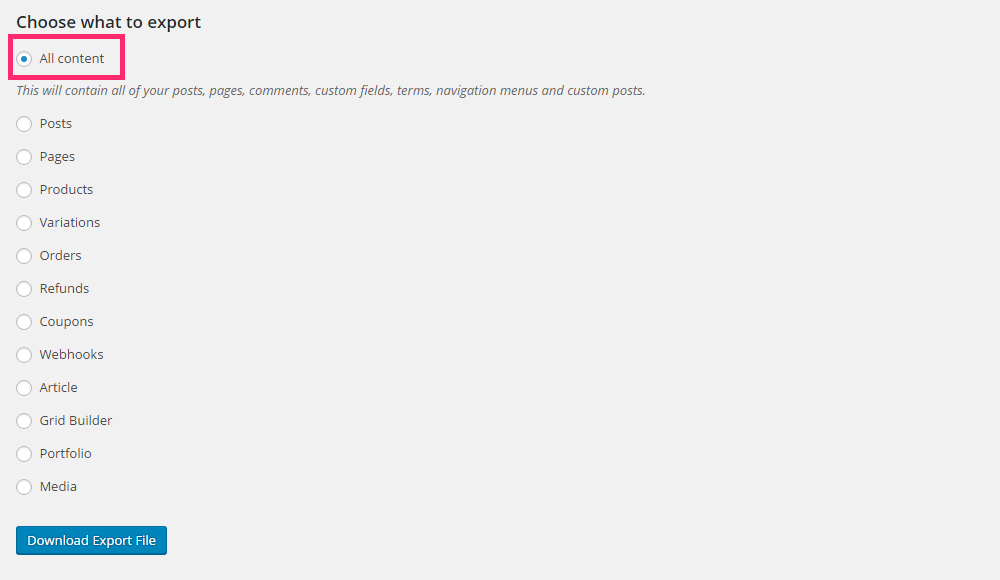
- On the following screen, you will be prompted to Choose what to export. Select the All content
- Click on the Download Export File button to proceed.
Once you press the button, you’ll notice that an XML file is downloaded to your computer’s drive that contains all of your WordPress.com site’s posts, pages, comments, custom fields, terms, navigation menus, and custom posts.
Step 2: Configure Your New WordPress.org Site
Keep in mind that we might receive a commission if you decided to purchase through these links.
If you’ve already set up your domain name and hosting service with Bluehost following the above-linked guide, it’s time to install WordPress.
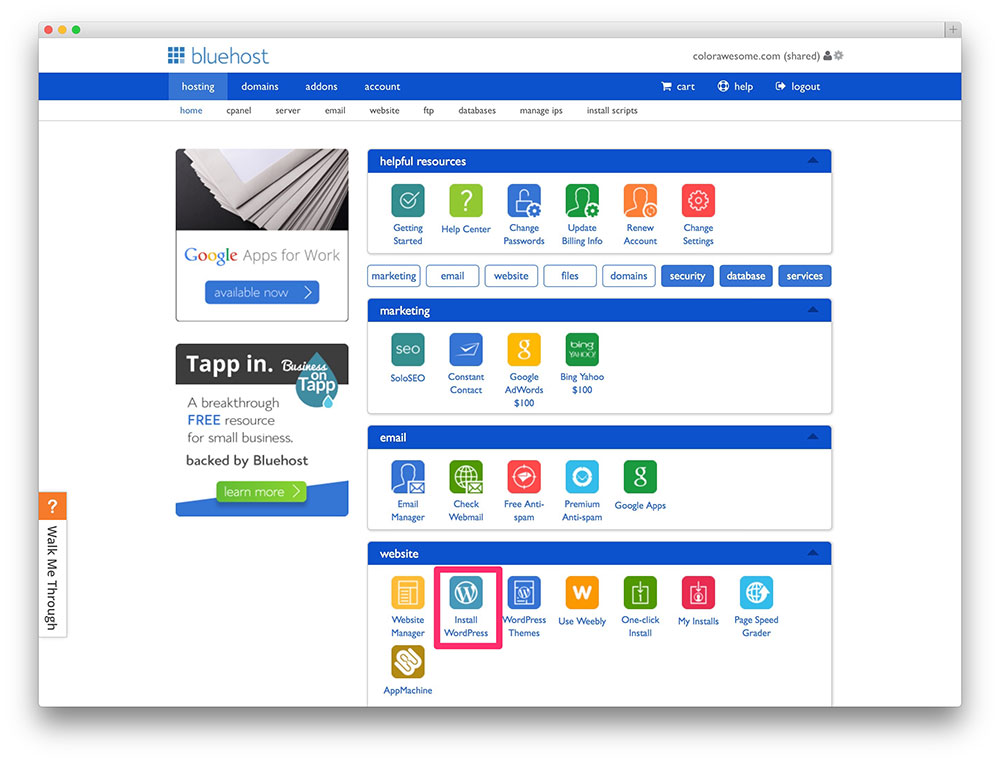
#1 Login to your Bluehost cPanel using the login details emailed to you by the hosting provider.
#2 Once you’re logged in, navigate to the website section from the homepage and click the Install WordPress button.
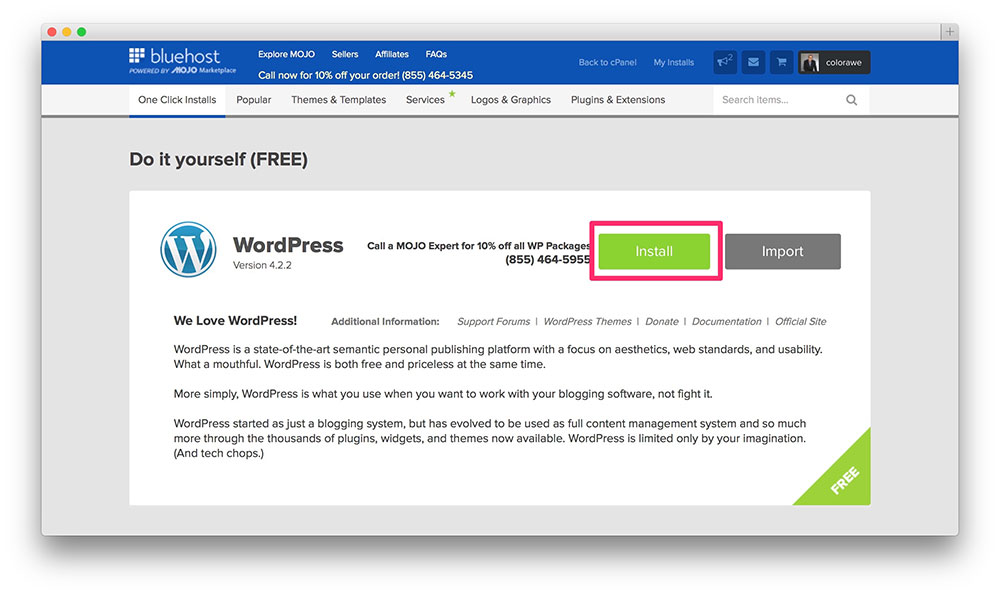
#3 On the following screen, you’ll be provided with important information about WordPress. Give it a quick read and click the Install button in the top-right section of the screen.
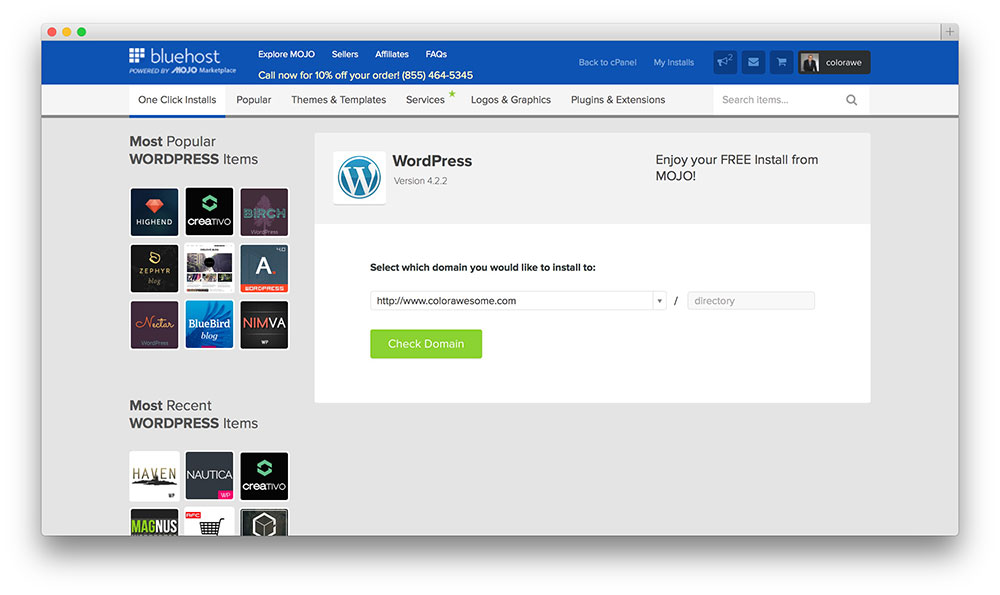
#4 Select the new domain name you’ve just registered (or your pre-registered custom domain name) and click the Check Domain button to proceed.
#5 Enter your site’s information and your admin login credentials in the next screen to complete the installation.
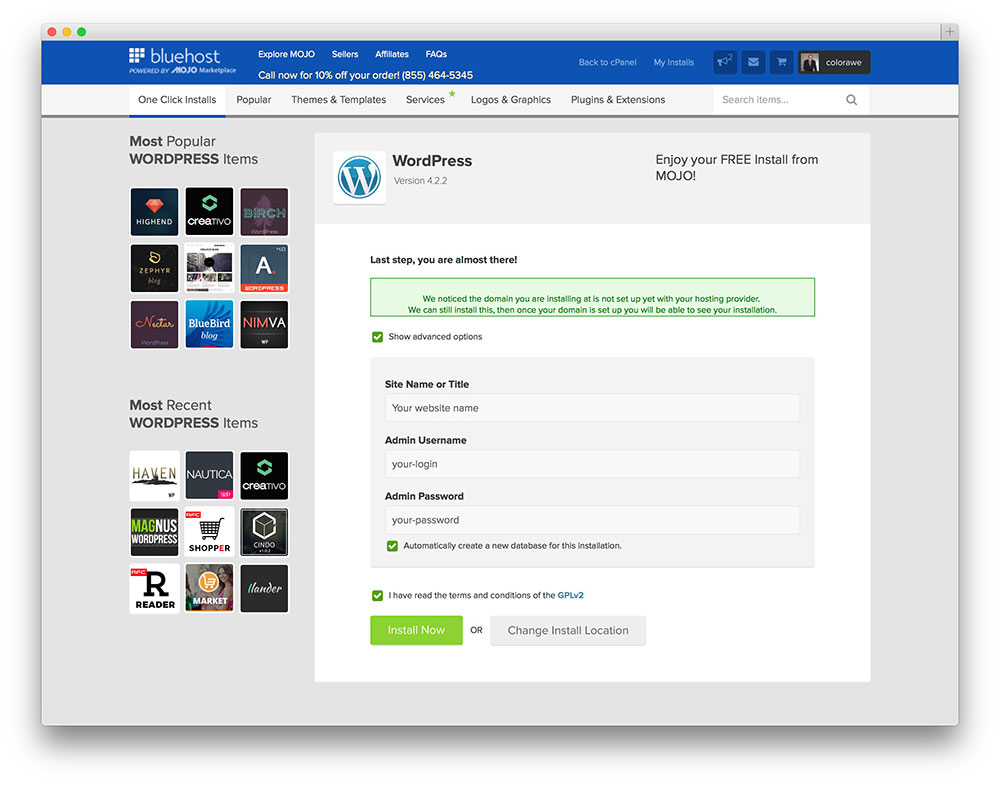
#6 Click Install Now.
Now that we’ve successfully installed WordPress to our new, self-hosted blog, it’s time to log in to your blog and import the XML file. Using the credentials specified in the fifth step, log in to your self-hosted blog’s WordPress Dashboard.
Step 3: Import Data to Self-Hosted WordPress Site
In this step, we’ll import the data we previously exported from the WordPress.com site to the self-hosted, WordPress.org site.
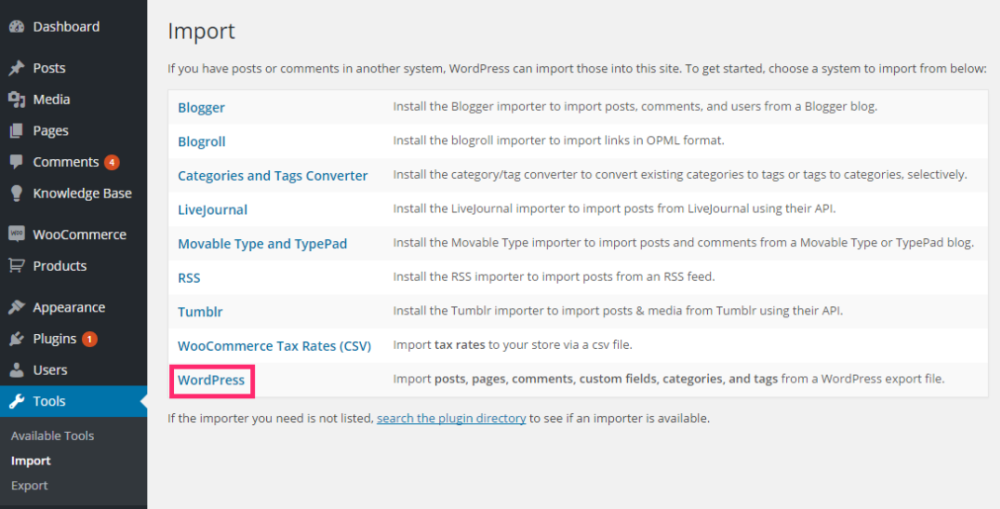
Navigate to Tools > Import from the WordPress Dashboard (from the new WordPress.org site).
You will be re-directed to the Import screen. Click the WordPress link to import data from a WordPress export file.
#1 Navigate to Tools > Import from the WordPress Dashboard (from the new WordPress.org site).
#2 You will be re-directed to the Import screen. Click the WordPress link to import data from a WordPress export file.
#3 In the following screen, you will be prompted to install the WordPress Importer plugin.
#4 Install and activate the WordPress Importer plugin.
#5 Once the plugin is installed, you will be asked to upload a WordPress export file. Click Choose File and browse your computer’s drive to locate the WordPress.com XML file that you previously downloaded.
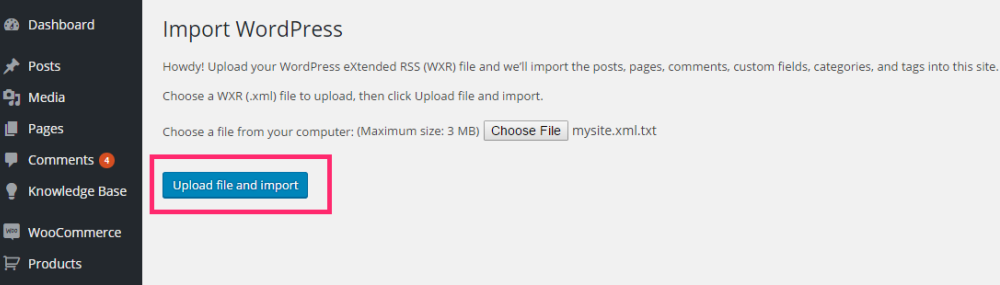
#6 Click Upload file and import button once the XML file is uploaded.
At this stage, you may run into a memory issue i.e. your XML file size exceeds the maximum size permitted by WordPress. To resolve this issue, follow one of the below-mentioned solutions:
- Submit a ticket to your web hosting provider requesting them to increase the maximum upload limit or import the XML file for you.
- Split your exported XML file using the WXR File Splitter and import the files one by one.
- Upload a custom php.ini file to your WordPress site’s root folder via the Bluehost cPanel File Manager with the following line added to it (10M stands for 10 Megabytes):
upload_max_filesize = 10M - Add the following two lines to your WordPress site’s .htaccess file:
php_value upload_max_filesize 10Mphp_value post_max_size 10M
Note: You can replace 10M with a different file size based on how big your XML file is.
#7 Once the XML file starts to import onto your new WordPress.org installation, you will be prompted to select a user to assign the old content to. Choose the user as per your requirements.
#8 Be sure to select the option that enables you to import your old attachments. This guarantees that your WordPress.com site’s audio, images, and other media files are imported as well.
At this point, you’ve safely moved most of your data from WordPress.com to WordPress.org. As an avid blogger, you might have had a whole blogroll set up on your free WordPress site. If that’s you then continue on to the next step and if not, you can skip to Step 5.
Step 4: Import Your Blogroll
By default, WordPress exports all links in Outline Processor Markup Language (OPML) format which is essentially a type of XML format that specifically caters to outlines such as blogrolls.
Those of you whose WordPress.com sites used the Links feature to organize and group links (in the form of a blogroll or otherwise) can follow these steps to import the relevant data to their WordPress.org blog.
#1 Locate your WordPress.com site’s OPML file by visiting the following link:
http://yoursite.wordpress.com/wp-links-opml.php
http://www.yoursite.com/wp-links-opml.php (for custom domains)
#2 Once the OPML file opens in the browser, save it to your computer’s drive.
#3 Login to your WordPress.org site and install the Link Manager
- Navigate to Plugins > Add New from the WordPress Dashboard.
- Search for “Link Manager”.
- Click Install.
- Once the plugin is installed, activate it by clicking the Activate
#4 You’ll see that a new menu item, Links, has been added to the admin bar.
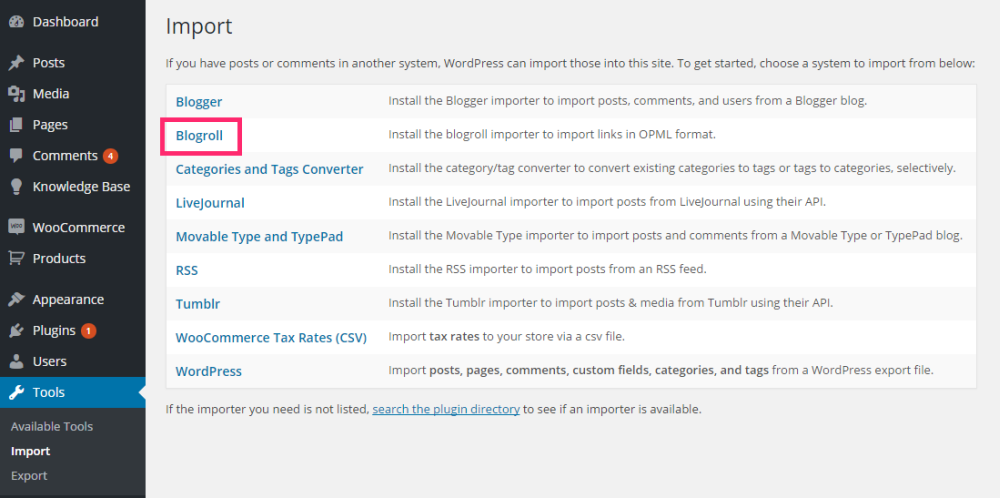
#5 Navigate to Tools > Import from the WordPress Dashboard.
#6 Click on the Blogroll link to import links in OPML format. This will install the OPML importer.
#7 Once the importer is installed, you will be prompted to upload the OPML file that you previously saved in the second step.
#8 Click Choose File and browse your computer’s drive to locate the OPML file.
#9 Click the Import OPML File button to proceed once the file is uploaded.
That’s all there is to it. You’ve successfully imported your links and blogroll from WordPress.com to your self-hosted WordPress site.
Step 5: Post-Transition Checklist
Now that your WordPress.com site has successfully been transferred to a self-hosted platform, there are a few more simple things left to cross off your list.
Hide Your WordPress.com Site
The very first thing you need to do now is hide your old WordPress.com site to ensure your viewership doesn’t land on the old site every time. Navigate to Settings > Reading from the WordPress.com site’s Dashboard. Under the Site Visibility section, tick the I would like my site to be private option.
Let Your Loyal Readers Know You Moved
How do you notify hundreds of loyal readers that you’ve upgraded to self-hosted WordPress.org? Publish a post, of course! Write a post updating your loyal viewership of the move and the domain change. Another popular option that bloggers adopt is WordPress’ premium Site Redirect service.
The Site Redirect service does exactly what its name implies – it’ll redirect anyone accessing your old domain name to the new, self-hosted WordPress site and it also ensures that search engines are redirected to your new domain with the purpose of preserving SEO efforts. For only $13/year, it’s great value for money!
Update All of Your Links
In Step 4 we took care of all of the external links and blogroll. Internal links have to be dealt with manually. Those of you who have every linked to your own site will have to go back and update each link by hand. It’s a ton of trouble but it can’t be ignored!
Wrapping It Up
WordPress.com is a great option for newbies wanting to test out the blogging waters but when it’s time to take things to the next level, nothing beats self-hosted WordPress.org. We hope that our guide on how to move your blog from WordPress.com to WordPress.org was helpful and easy to follow.
Have you moved your blog from WordPress.com to WordPress.org? Did this guide help you in doing so and did you face any problems along the way? We’d love to hear from you so let us know in the comments section below!
@colorlib.com