You are worried when you see this message on your WordPress site: “Briefly unavailable for scheduled maintenance. Check back in a minute.” It is known as ‘maintenance mode’. Rest assured that this error is completely normal – you haven’t been hacked! In this tutorial, we will help you figure out How to Fix WordPress Stuck in Maintenance Mode issue.
What Is WordPress Maintenance Mode?
When your site updates plugins, themes, or WordPress core itself to the next version, it is put in what is known as ‘maintenance mode’. It displays a message across your site that lets users know you’re working on something so you can perform updates without forcing users to use a semi-broken site.
Usually it happens so quickly that you don’t even notice it. At the most, you’ll just see a message like this:
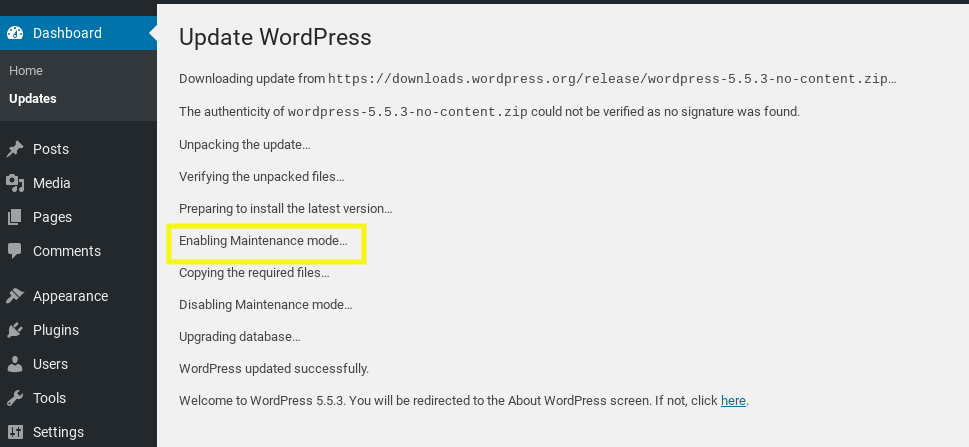
WordPress activates maintenance mode by generating a file called .maintenance in the root of the folder tree. If the update worked normally, the script will complete and WordPress will remove the .maintenance file. Then the message will disappear and your site visitors will be able to see your live content again.
Unfortunately, problems occur when the “Briefly unavailable for scheduled maintenance. Check back again in a minute” message is still shown even after the update is supposedly complete.

This most often occurs with WordPress core updates, and can be caused by a handful of issues, such as:
- A server’s slow response time
- The interruption or timeout of an update script
- A low memory issue
- The maintenance file thinks there are some updates it still needs to finish
- You’re trying to update too many things at once (and too quickly)
- You’re using a maintenance mode plugin
- You closed out the browser tab before the updates were complete
How to Fix WordPress Stuck In Maintenance Mode?
The easiest way to fix this message is to take WordPress out of maintenance mode by manually deleting the .maintenance file. Depending on your hosting provider, there are two methods you can use to do this:
- Using a File Transfer Protocol (FTP) client
- Using cPanel and File Manager
Note: these methods involve manually removing the file from the root directory of your installation. Therefore, you shouldn’t attempt this unless you’re familiar with the process and already have a backup of your site.
1. Fix the Maintenance Mode Using FTP
To get your website out of maintenance mode, all you really need to do is delete the .maintenance file from your site’s root folder using FTP.

You look in the root folder to see if there is a file called “.maintenance” present. Then select it and delete it.
After deleting the “.maintenance” file, it is recommended to clear your browser cache and reload your site homepage. You should be able to access your site now.
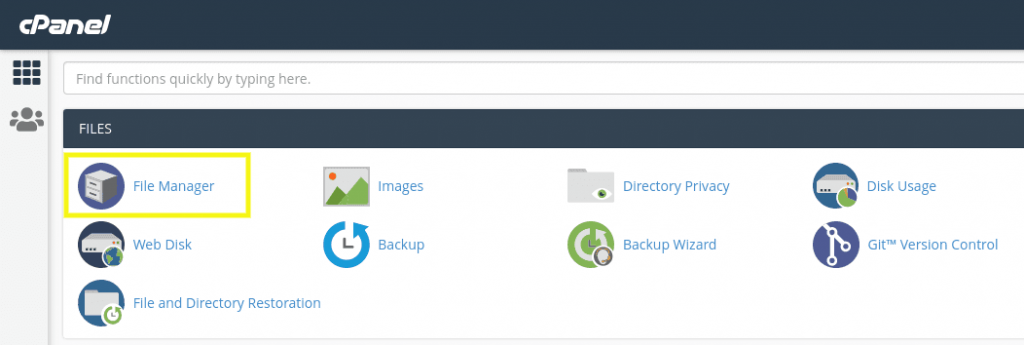
2. Use cPanel to Take WordPress Out of Maintenance Mode
If your hosting provider uses cPanel, you can access your site’s root directory and delete the .maintenance file through the File Manager feature. To do so, log into cPanel, then select File Manager under the Files section:
Within the File Manager, click on the name of your site to the left, then look for the .maintenance file within the /public_html folder:
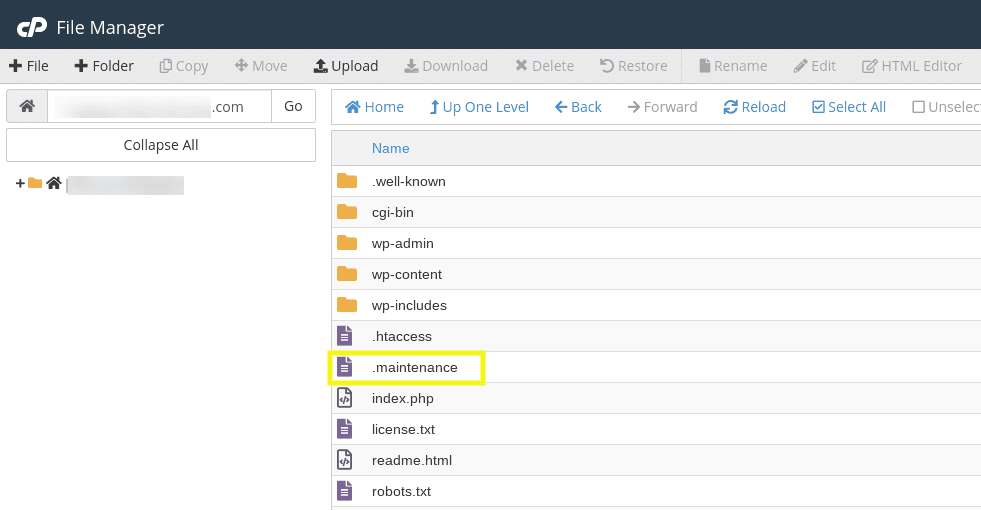
Right-click on the file, then select Delete. Return to your WordPress page in a new browser tab. The ‘unavailable’ message should now be gone.
3. There is a theme or plugin that has not updated correctly
Sometimes an error in a plugin or a theme can cause this issue. Renaming the “plugins” or “themes” folder name can help find out the cause of the issue.
- Once again, you will have to connect to your FTP server to access the root folder.
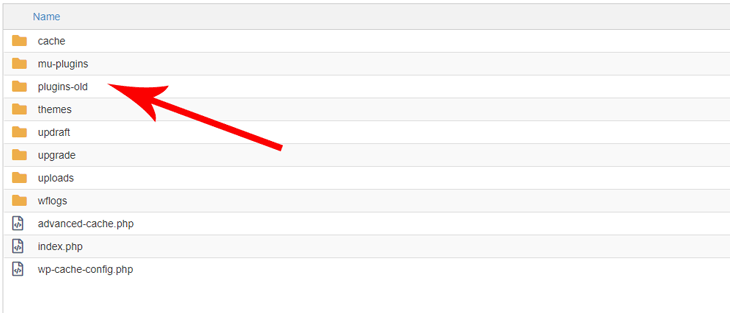
- Go to the “wp-content” folder and change the “plugins” folder to something else like “plugins-old”. Once the “plugins” folder has been renamed, WordPress will deactivate all the plugins on your site.
Refresh the website to see if your site loads. If it loads now, the issue is related to the activated plugins.
SOLUTION:
Step 1: On your FTP server, go back to “wp-content” folder, rename “plugins-old” back to “plugins“.
Step 2: Then login to your site’s WP Admin, go to Plugins, then activate the plugins one by one to find out which one is causing the problem.
Step 3: Once you find the problematic plugin, delete that specific plugin folder on your FTP server.
Step 4: Then try to reinstall the plugin again.
If the problem persists after reinstalling the latest version, contact the plugin’s author/developer (there might be bugs in that plugin).
If your site still doesn’t load after renaming the “plugins” folder, then go back to the “wp-content” folder. This time rename the “themes” folder to something else like “themes-old“.
Tips for Preventing Maintenance Mode in the Future?
- Don’t close out your browser while updates are still running. This can cause your server to timeout and, in turn, fail to complete the process and update the .maintenance file.
- Use a staging site to test any updates you want to make. Compatibility issues can sometimes cause a snag that will interfere with the updating process. Therefore, it’s important to verify any new themes or plugins you’re using are compatible with your WordPress version and each other.
- Avoid making too many updates at the same time. While bulk updates are convenient, they can lead to plugin conflicts and other issues.
- Consider upgrading to a higher hosting plan. PHP scripts run WordPress updates and if your storage is low or your server is slow to respond, it can interrupt the installation process before the system is able to turn off maintenance mode.
So you now know everything you need to fix a WordPress site stuck in maintenance mode, and to prevent your sites from getting stuck. If you need support from our pros, you can contact us for free.